If you’re an IT administrator managing multiple Windows servers, you may have heard of Remote Server Administration Tools (RSAT). RSAT is a collection of Microsoft utilities that let you manage Windows Server roles and features remotely from a Windows client machine — meaning you don’t need to log in to the server itself to perform administrative tasks.
In this article, I will explain how to install RSAT on Windows 11. There are several ways to install RSAT on your device, and the installation process varies across different Windows versions.
How to install RSAT on Windows 11
Here’s how you can install the GUI version of RSAT from Windows Settings:
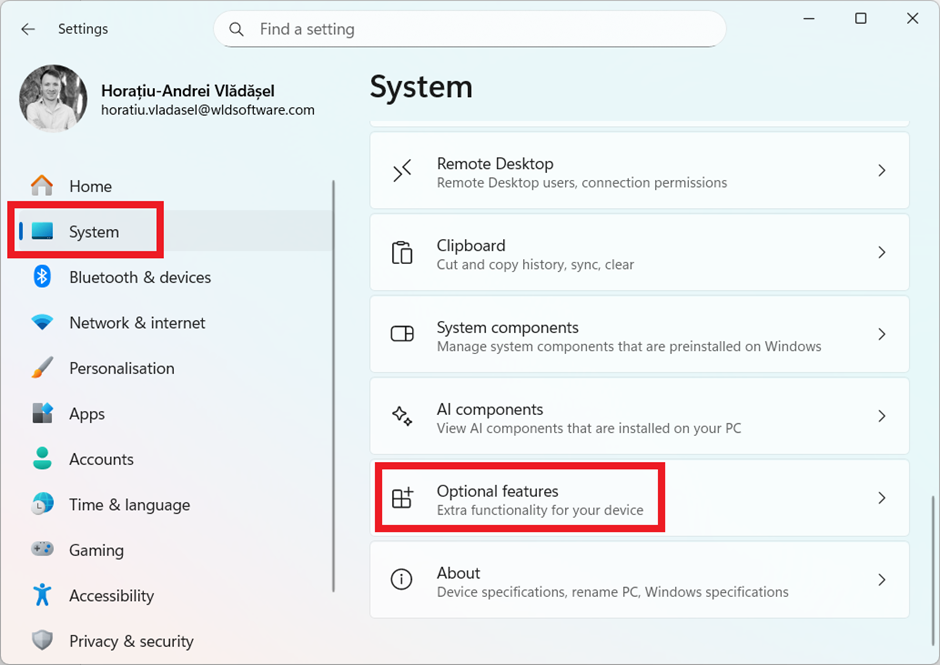
1. In the “Settings” menu, click on “System”, and then click “Optionalfeatures”
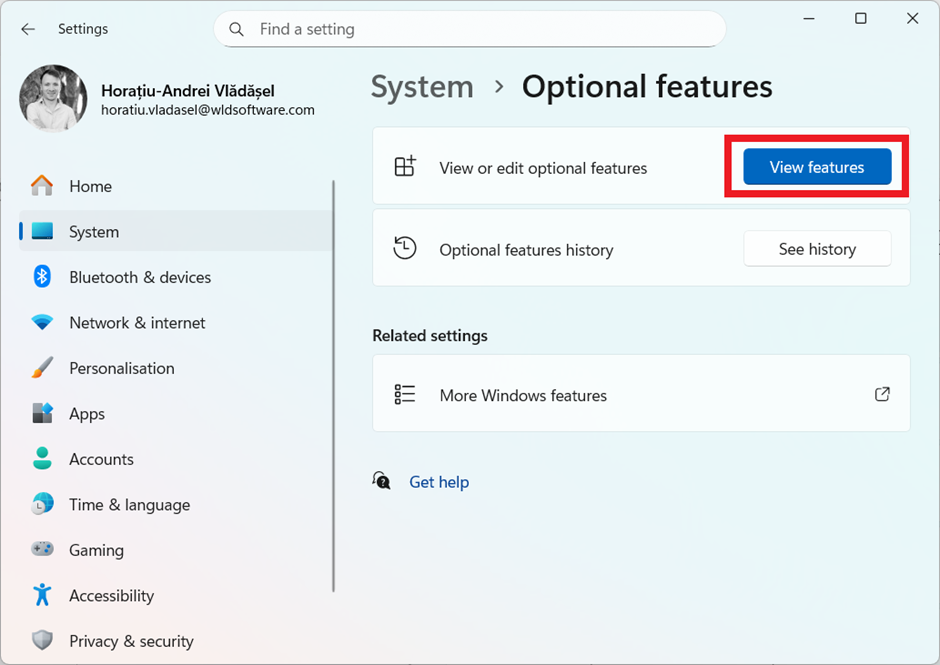
2. Click “View features”.
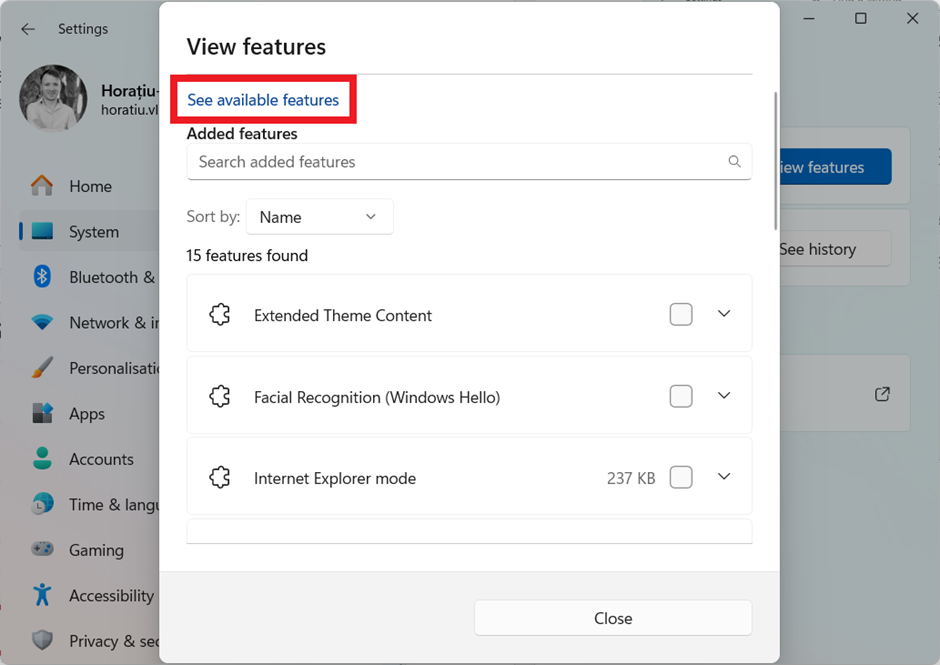
3. Click “See available features”.
4. Type “RSAT” in the search field.

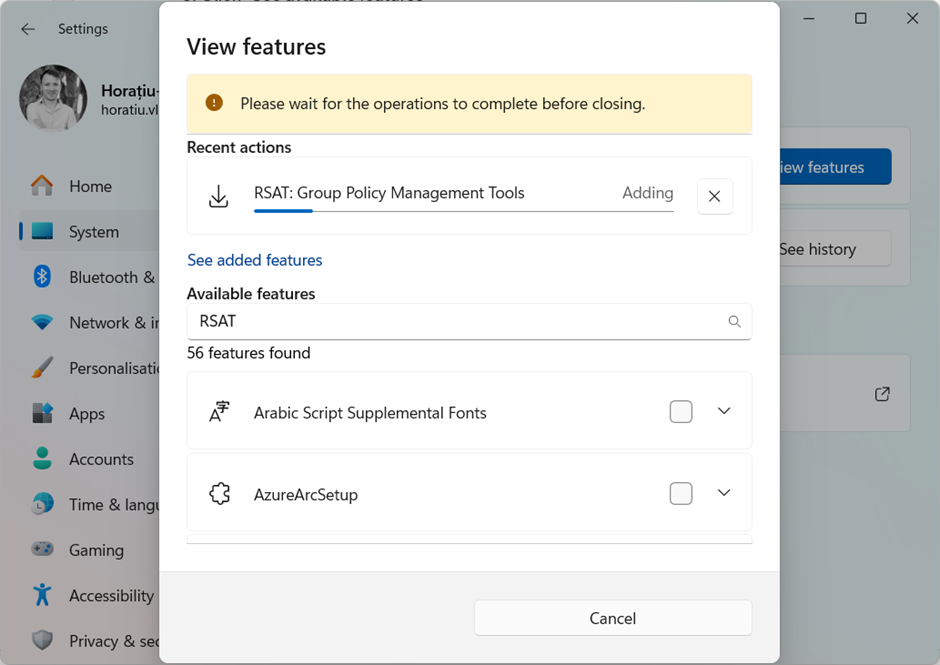
5. Select the RSAT features you want to install and then click “Add”.
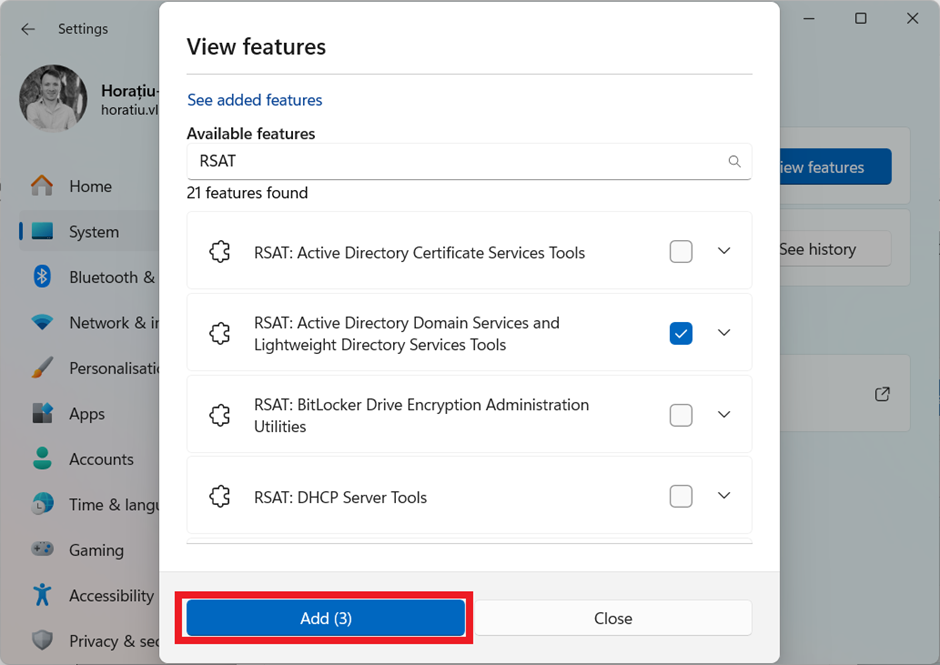
6. Wait for operations to complete before closing the window.